
Free AI summary of this YouTube video by SumTube
Gaming-Maus aus Holz bauen!
TL;DR
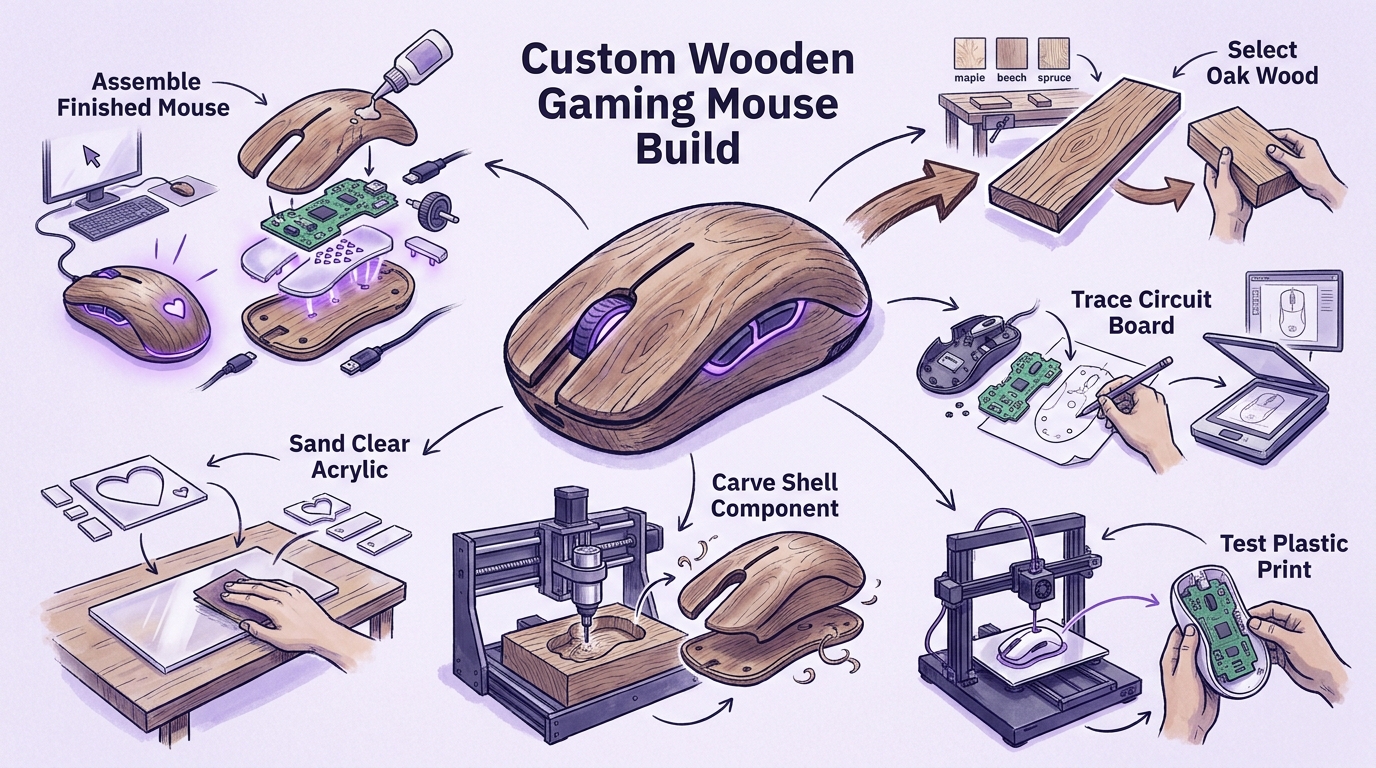
In this video, a custom gaming mouse is crafted out of solid wood to complement a previously built wooden keyboard. The creator guts an old mouse for its internal electronics, designs an ergonomic shell in 3D modeling software, and uses a CNC machine to carve the wood components. After overcoming structural cracks, installing frosted acrylic light diffusers, and applying a clear coat, the functional wooden RGB gaming mouse is successfully tested in everyday use and gaming.

Key takeaways
- 2:22Digitizing exact hole patterns with a scanner and fine drill bits avoids tedious manual measurements when fitting existing electronics into custom designs
- 8:19A center slit carved into a solid wooden upper shell allows the left and right mouse buttons to flex independently without snapping
- 20:35Sanding clear acrylic creates a frosted diffuser effect, evenly softening RGB LED lighting under custom wooden cutouts
- Wood glue, clamping, and careful sanding can seamlessly repair delicate CNC-milled parts that crack during extraction
Tap to enlarge
Most valuable section
For whom
DIY creators, tech enthusiasts, and woodworking fans interested in custom peripheral builds.
It shows the completed wooden mouse fully lit up with soft RGB lighting, smooth scrolling, and responsive clicking in real-time gaming tests.
Detailed summary
1. Selecting the Wood and Sourcing Electronics
0:00The project begins with the goal of creating a custom wooden gaming mouse to complete a setup matching a previously built wooden keyboard. After comparing spruce, beech, maple, and oak, oak is selected for its striking grain and durability, requiring a trip to the hardware store for a solid block.
To power the new mouse, an old, dusty gaming mouse is disassembled for its internal electronics. The creator carefully removes the screws and extracts the circuit board, optical sensor, and mouse wheel assembly.
2. Digitizing the Layout and 3D Prototyping
2:22To ensure the circuit board will fit precisely inside the new shell, the creator traces the mounting holes onto paper with a 0.5 mm drill bit. The paper is scanned into 3D software, scaled, and used as a precise template for designing the mouse's bottom plate.
The initial design is 3D printed first to verify the fit without wasting wood. The plastic test print confirms that the circuit board mounts correctly, the optical sensor aligns with the bottom cutout, and all mounting posts line up.
3. Designing the Upper Shell and Flex Buttons
6:45Designing the top shell proves challenging due to the organic, curved ergonomics required for a comfortable grip. After discarding a chaotic early attempt, the creator pivots to a refined gaming mouse shape with comfortable side contours and a thumb rest.
To make the wooden buttons function, a central slit is cut into the model, allowing the left and right buttons to flex independently. Additionally, a heart pattern is mapped out in pixel art on the back of the shell to allow RGB lighting to shine through.
4. CNC Milling the Wooden Components
10:06A CNC machine carves the base plate and upper shell out of the oak block using multiple router bits. The top shell requires double-sided milling, using guide pins to align the piece when flipped so the interior can be hollowed out accurately.
Once the CNC finishes, the parts are freed from their surrounding timber blocks. During extraction, a wall on the delicate upper shell cracks under pressure, requiring a glued repair block and thorough sanding to restore the seamless look.
5. Installing Electronics, Buttons, and Light Diffusers
17:03With the wooden parts sanded and repaired, the interior components are installed. The circuit board is screwed into pre-drilled pilot holes, a micro-USB to USB-C adapter is fitted, and custom 3D-printed brackets and thumb buttons are mounted.
To create smooth RGB lighting, laser-cut acrylic inserts are sanded to create a frosted milk-glass effect. These diffusers are placed behind the heart-shaped cutouts and button gaps before the wood receives a protective clear coat.
6. Final Assembly, Testing, and Gaming Demo
21:59After the varnish dries, the RGB LED strip, top buttons, and bottom Teflon glide feet are installed. The finished wooden mouse is plugged in and tested on a computer setup.
The mouse responds smoothly to desktop navigation, scrolling, and clicking. A quick gaming session confirms that both main buttons and the side thumb switch register reliably, concluding a successful build.
Questions this video answers
How were the internal mouse components fitted into the custom wooden body?
The creator traced the old mouse's circuit board mounting holes on paper using a 0.5 mm drill bit, scanned the paper with a smartphone, and imported the template into 3D design software. After calibrating the size, the custom shell was modeled around the exact hole layout and prototype-tested with a 3D printer before CNC milling.
How do the wooden mouse buttons click without breaking the wood?
The upper wooden shell features a structural slit down the middle that separates the left and right buttons. This design leverages the natural flexibility of thin wood, allowing each button to flex downward independently when pressed and trigger the switches underneath.
What wood was selected for the gaming mouse?
Oak was chosen for its distinct, beautiful grain and overall structural strength. Other species like spruce and maple were considered, but spruce shifted unappealingly when varnished and maple remained too pale.
Ask a follow-up Premium
About this summary
SumTube AI wrote this recap from the video's words and chapters. Credit and the original belong to Tomary.