
Free AI summary of this YouTube video by SumTube
03-Selection In Navisworks
TL;DR
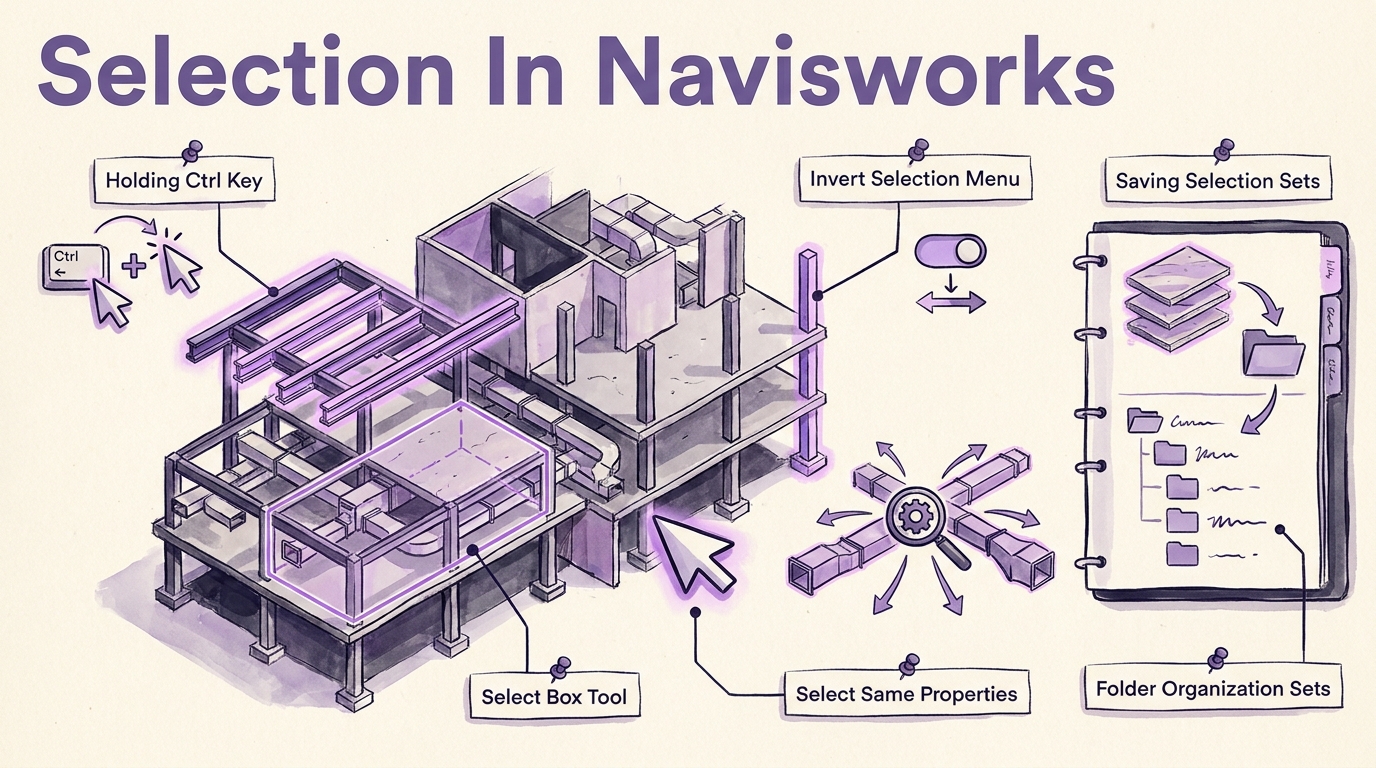
This tutorial covers essential element selection techniques and set management in Autodesk Navisworks. It explains how to perform individual and box selections, use keyboard modifiers to refine selections, and invert or select matching elements based on properties. Additionally, it demonstrates how to organize selection sets into folders and utilize the Selection Tree for structured model navigation.

Key takeaways
- 0:42Using Ctrl allows adding or removing specific elements from a selection set without losing the overall selection
- 3:31Saving selections into custom Sets enables quick re-selection of key model elements during clash detection and coordination
- 8:08The Select Same feature quickly gathers elements with matching parameters like type, name, or level
- 22:12The Selection Tree exposes model hierarchy, helping identify modeling errors across floors or levels
Tap to enlarge
Most valuable section
For whom
BIM engineers and coordinators looking to streamline model navigation and set management in Navisworks
Selection Sets and Folder Organization7:12
It shows how to efficiently group, label, duplicate, and structure model elements into folders for streamlined project analysis.
Detailed summary
1. Introduction to Selection Techniques
0:00The tutorial introduces two fundamental skills in Autodesk Navisworks: selection techniques and project element management. Mastery of these features is essential because almost every workflow in Navisworks requires selecting elements before performing analysis or modifications.
The video demonstrates basic mouse selection and shows how holding the Ctrl key allows users to select multiple elements simultaneously or deselect individual items without resetting the existing selection.
2. Box Selection and Direct Selection Tools
1:42This section covers the distinction between the standard Select tool and the Select Box option. Using Select Box enables a window drag selection to quickly grab multiple elements within a defined rectangular region.
The presenter highlights the importance of switching between single element selection and window selection to prevent confusion when manipulating complex 3D models.
3. Saving Selection Sets
3:12The process of saving custom selection groups as Selection Sets is demonstrated. By saving a group of selected elements (such as recurring floor slabs), users create a reusable dataset for future operations.
This functionality is critical for BIM coordination tasks, particularly clash detection, as it eliminates the need to manually re-select identical sets of structural elements repeatedly.
4. Select All, Select None, and Invert Selection
5:30This part covers global selection controls found under the Select ribbon menu, including Select All, Select None, and Invert Selection. Keyboard shortcuts like holding Shift while selecting are also shown as alternative ways to capture the full model context.
Invert Selection allows users to select a specific element and instantly invert the selection to target every other object in the scene, which is helpful when isolating or filtering out specific components.
5. Selecting Elements by Shared Properties (Select Same)
7:12The presenter explores the 'Select Same' feature, which automatically selects elements matching specific parameters of an initially highlighted object. Options include selecting elements with the same Name, Type, Element ID, or Level.
Demonstrating this tool on slabs and steel beams shows how fast users can select all items of a single structural type across the entire project and save them directly into named Selection Sets.
6. Managing Sets and Folder Organization
13:16This section focuses on managing the Sets window interface, including using Auto-Hide and Pin features to optimize screen space. Users learn how to create folders within the Sets panel to group related selection sets logically, such as placing all structural components into a dedicated folder.
Additional management features are explained, such as sorting sets alphabetically, duplicating selection sets for variations, adding comments to sets, and deleting unnecessary entries.
7. Navigating the Selection Tree
18:20The tutorial transitions to the Selection Tree tool, explaining how it displays the hierarchical file structure of imported model files (such as NWC files). Users can browse through levels, floors, and individual sub-components directly from the tree interface.
The presenter demonstrates how expanding floor levels in the tree reveals individual structural components (walls, floors, beams), helping coordinators inspect detailed model breakdown structures and identify potential modeling errors.
Questions this video answers
How do you select multiple elements or deselect specific items in Navisworks?
Hold the Ctrl key while clicking on elements to add them to your current selection. To remove a specific element from the selection group, hold Ctrl and click on that item again.
What is the purpose of Selection Sets in Navisworks?
Selection Sets allow you to save groups of selected model elements into reusable database sets. This saves time during repeated tasks like clash detection, allowing you to re-select complex groups of objects with a single click.
How does the 'Select Same' tool help with model navigation?
The Select Same tool automatically selects all elements in the model that share specific properties with your current selection, such as type, name, geometry, or level. This is particularly useful for quickly grouping similar structural components like all beams or slabs.
How can the Selection Tree be used to spot modeling mistakes?
The Selection Tree displays the structural hierarchy of the model level by level. By expanding floor levels in the tree, you can check if elements are incorrectly assigned, such as a single column spanning from the first to the tenth floor instead of being broken down per floor.
Ask a follow-up Premium
About this summary
SumTube AI wrote this recap from the video's words and chapters. Credit and the original belong to كريم عادل - Karim Adel.